Denise Nouvion is one half Memoryhouse and is one very crafty person. So, rather than give her the same FAQs, we asked her for a recipe or something like that, which might reveal a little more about her creative process and also provide you with a nice something make-and-do this weekend...
SAILBOAT
Somewhere in the closet in my apartment there is a box of materials ranging from scrap paper to dollar store animal figurines. I am a hopelessly addicted collector-of-things and have an innate love for improvised crafts, which is likely parallel to my love of antiques. I try not to throw anything away and challenge myself with new projects. When I used to work at a photo lab, I would hold onto some of the defected photos that were discarded by customers, which I would then I use for collages. I've never been able to follow anyone else's craft-recipes myself so I support any substitution for materials, as my method is far from perfected and changes slightly every time.
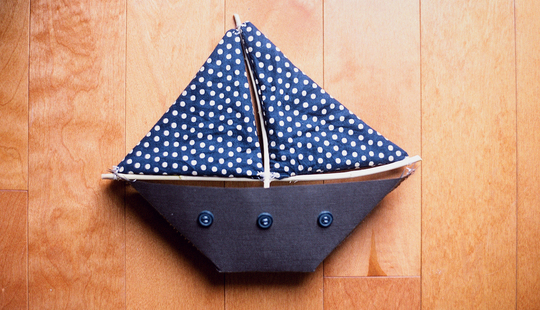
The first time I made this sailboat (or yacht) was for Evan's birthday last year. I'm not exactly sure how I came up with the idea, but it’s probably my favorite concoction thus far. What I had forgotten prior to taking on this craft was how much time it actually took. You will need to be patient in order to resist destroying your boat before it is completed. I don’t know if anyone would want to actually take this on, but if you do, hopefully visual aids will ease any frustration.
MATERIALS
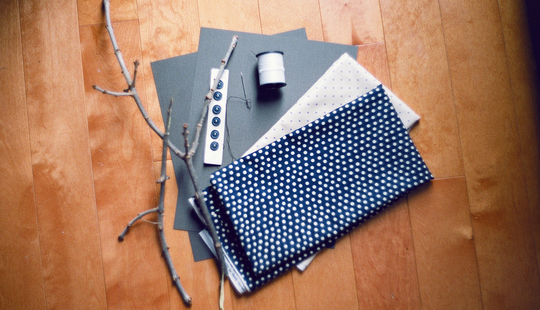
Patterned fabric
Bow-shaped twigs
Needle and thread
Two (2) sheets of coloured card stock paper (textured is best)
One (1) regular sheet of paper
Six (6) small identical buttons
Scissors
Hole puncher
Knife
INSTRUCTIONS
PART I
First, create the base of the boat which is comprised of two attached semi-triangles; a fold over technique is ideal for getting both sides perfectly mirrored. I suggest trying this out first on a regular sheet of paper, which you can then cut out and re-trace onto card stock and again, cut out.

Fold the shape in half and the four inner-edges of the paper upward.
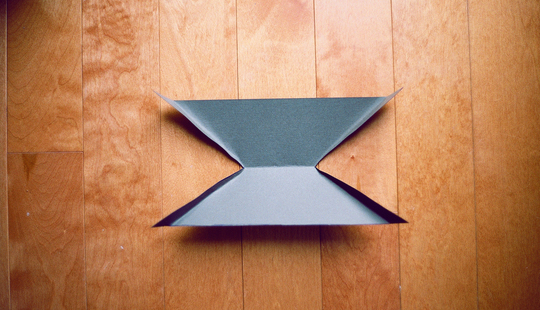
Hold the folded edges together on one of the sides so they slightly overlap; the top of each fold should meet at a point. Use your needle and thread to fasten them together. (Some preliminary knowledge of sewing will help, but you can use glue or staples here as well). Do this to both sides.
Sew three (3) buttons onto either side of the boat.
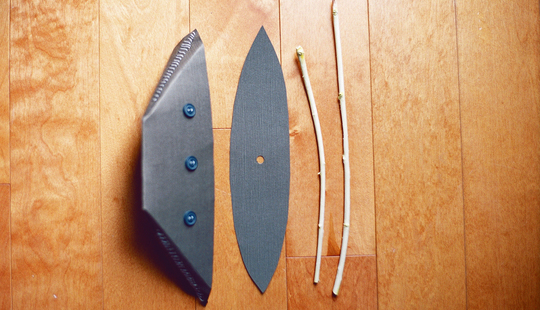
Go into your backyard and grab the best two (2) bow-shaped twigs you can find on the ground or off of the tree that is technically your neighbour's but is reaching far enough into your yard to justify the removal of said branches. Take out your favourite camping knife and use it to take the bark off of your twigs. To get into the mood, you may want to create a whittling playlist with outdoorsy-named bands like Mountain Man, Horse Feathers, and Deerhunter.
Get out your other piece of card stock and hold your boat upside down over top of it. Trace an outline of the inner-space of the boat; this will turn into your deck. Cut the shape out and test to see how it fits inside. You will probably have to cut the sides down a little in order for it to fit.
Punch a hole in the centre of your deck. This will later hold your mask/stick in place.
PART II
Turn the fabric of your choice inside out and fold it in half. Lay your twigs on top of the fabric and draw the shape of your sails on either side. Make sure to test your stick in the bottom part of the boat to see how much will actually be submerged; this will help you figure out how large your sails can be.
Cut around each sail individually to remove it from the larger portion of the fabric. Sew along the shape of each sail—you should be sewing through both folds of your material. Make sure to leave a space between where your sewing starts and ends (approximately one or two centimeters). Cut any access material away from the sail, leaving a centimeter or two of extra material outside the shape.
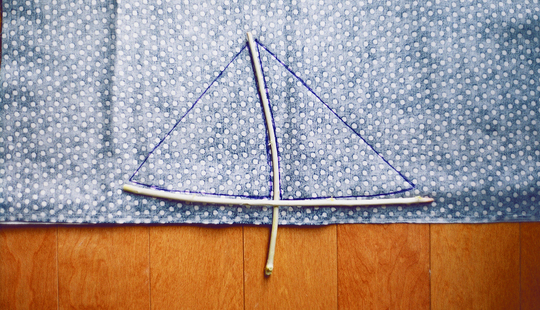
Turn the sails inside out by pulling the interior through the hole that you left. When you are finished, sew up the hole.
Fasten your sails to the mask by sewing through a corner of the sail and wrapping it around the stick. You can hold the thread in place by using your knife to create small notches in the wood.
Attach the outer corner of the sails to either end of the second stick. Fasten both sticks together by wrapping thread around the point of convergence.
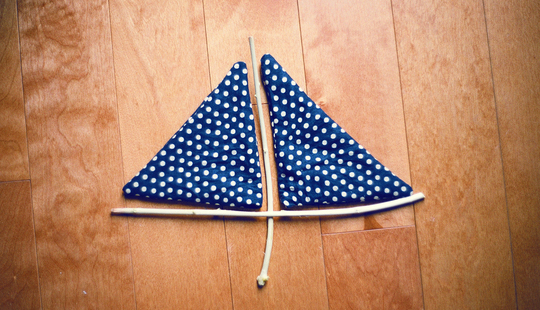
Put the end of the mask through the hole in the deck that you created earlier. You will need to add weight to the bottom of the stick in order to keep it in place inside the boat. There are a number of ways to do this, the ideal being to get your hands on some type of moldable foam which you can then super-glue inside of the boat. Obviously this isn’t always practical, so Playdo, flubber, tape, etc, may also work.
Sew or staple the deck at either ends of the boat to hold it in place.
Article by: Denise Nouvion Banner by: Kristen Sison


